
Instrumentation Tube Fitting Troubleshooting: Leaks, Galling & Make-Up Faults
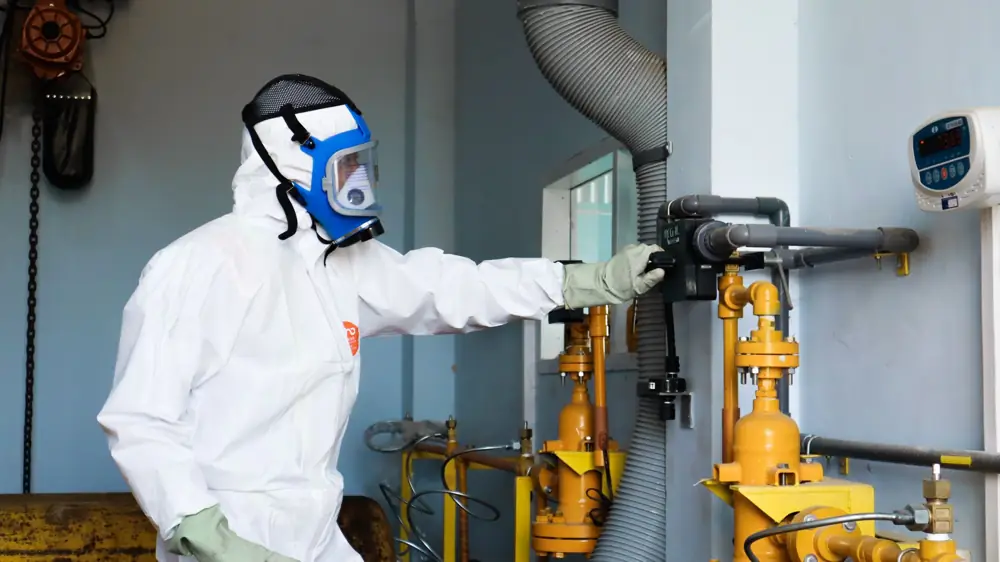
Instrumentation tube fitting troubleshooting is the systematic diagnosis and correction of leaks, improper make-up, galling and seizing, and mechanical-grip failures in stainless-steel and high-nickel compression tube fittings, instrumentation valves, and manifolds on gas and liquid analytical and process lines.
A leaking instrumentation tube fitting is almost always a make-up or tube-prep fault, not a bad fitting. Check pull-up with a gap-inspection gauge, confirm the tube is bottomed and that its outside diameter is clean and round, and verify you have not mixed ferrule brands on one joint. If the ferrule is cracked or will not bite, cut it off and re-make the connection on a fresh tube end.
This guide is for stainless and high-nickel instrumentation compression fittings and valves, not copper or brass plumbing compression fittings, push-fit water fittings, PEX, or automotive needle valves. The failure modes, the seal mechanism, and the fixes differ, so plumbing "just tighten it more" advice does not apply here.
Also Known As: Leak, Galling & Make-Up Fault Terminology
Engineers describe these failures in many ways, and the same fault carries different names on different sites. A weeping tube fitting, a seeping or dripping connection, a new tube fitting leaking at its first make-up, a fitting that "won't seal" after tightening, and a compression fitting leaking after re-assembly are all the same under-sealed joint, and "how to stop a tube fitting leak" has one answer across all of them: diagnose the make-up, do not simply re-tighten. A tube blow-out, tube pull-out, or ejected tube describes a fitting whose ferrule never gripped, commonly a cracked or split ferrule. Galled threads, a seized nut, and cold-welded threads describe stainless-on-stainless make-up damage. A valve stem leak, gland leak, bonnet leak, or packing leak is the valve equivalent, while a passing or "won't shut off" valve is a seat leak. Related process and standard designations you may see include the 1-1/4-turn pull-up method, gap-inspection-gauge verification, ASTM F1387 (compression-fitting mechanical qualification), ASME B1.20.1 (NPT tapered thread seal), and NACE MR0175 / ISO 15156 (why a swapped alloy still leaks under H₂S if wrongly selected).
Symptom → Cause → Check → Fix Diagnostic Matrix
Use the table below to move from what you see to the likely root cause, the check that confirms it, and the correct fix. Make-up figures follow general instrumentation practice; confirm the make-up turns for your exact size and alloy on request. Never work on a pressurized line.
| Symptom | Likely root cause | Diagnostic check | Corrective fix | Prevention / next step |
|---|---|---|---|---|
| Leak at a fresh make-up | Insufficient pull-up (under-tightened) | Gap-inspection gauge still fits the gap; nut not to position | Complete pull-up to the fitting maker's specified turns past finger-tight | Gauge every make-up |
| Leak that worsens; ferrule deformed | Over-tightening / over-swage; collapsed ferrule | Visible over-swage, curled or cracked ferrule | Cut off, replace nut and ferrule, re-make on a fresh tube end | Use the gap gauge as the stop, not feel |
| Tube pulls out / blows out under pressure | Ferrule not gripping, no bite | Tube slides in the nut; no swage mark on the tube | Replace the ferrule set; bottom the tube before pull-up | Hardened ferrule to requirement |
| Tube not bottomed | Tube not seated to the shoulder before make-up | Mark the tube; check insertion depth | Re-insert to the bottom, re-gauge | Installation and gauging guide |
| Tube-prep defect | Scratched OD, burr, out-of-round, non-square cut | Inspect and deburr the tube end; roll on a flat | Re-cut square, deburr, re-make | Tube sizing and wall thickness |
| Tube too hard | Tube harder than the ferrule → no bite | Compare tube hardness to spec (tube must be softer) | Use correctly annealed instrument tube or a matched hardened ferrule | Hardened vs non-hardened ferrules |
| Thread (NPT) leak | Tapered-thread seal, not a mechanical seal | Leak is at the pipe thread, not the tube nut | Re-seal with PTFE tape or paste, correct engagement | Identify your thread type |
| Galling / seized nut | Stainless-on-stainless cold welding | Threads torn; nut will not turn | Replace galled parts; lubricant or silver anti-galling plating | Specify silver-plated hardware |
| Vibration / fatigue leak | Cyclic loosening or tube fatigue at the ferrule | Leak appears after run-time; gaps at tube supports | Support and clamp the tubing; re-make | Support tubing with clamps |
| Mixed-brand leak | Ferrule / nut geometry mismatch across brands | Interchanged parts on one joint | Rebuild the joint on one qualified system | Why mixing brands leaks |
| Corrosion / pinhole leak | Wrong alloy for the media | Localized pitting or cracking | Re-select the correct corrosion-resistant alloy | Material selection by service |
| Valve stem / packing leak | Loose gland, worn packing, wrong seal for temperature | Leak at the stem under pressure | Re-torque the gland; replace packing | Seal material temperature selection |
| Valve seat leak (passing) | Damaged seat, debris, wrong seat material | Downstream flow when shut | Clean or replace the seat | Needle valves |
Why a Compression Tube Fitting Leaks (Make-Up & Tube Prep)
A stainless or alloy instrumentation fitting seals when the nut drives a ferrule that swages onto the tube, the seal is mechanical, made by the ferrule, not by thread sealant or a soft plumbing ferrule.
Under-Tightened vs Over-Tightened Tube Fitting Pull-Up
The most common cause of a tube fitting leaking after tightening is incomplete pull-up. General instrumentation practice is to pull the nut past finger-tight by a set amount, commonly about 1-1/4 turns for 3/8 in and larger sizes and less for smaller sizes, but the arbiter is a gap-inspection gauge, not feel. If the gauge still enters the gap between the nut and body, the joint is under-pulled-up; complete the make-up. Over-tightening is the opposite failure: an over-swaged, collapsed or cracked ferrule that leaks worse the more you turn it. Once a ferrule is over-swaged, cut it off and re-make on a fresh tube end. For the full procedure, see ferrule installation and gauging.
Tube Preparation: Bottoming, Cut Quality, OD Condition & Hardness
Even a perfect pull-up leaks if the tube is wrong. The tube must be fully bottomed before make-up, cut square, and deburred inside and out. A scratch running along the outside diameter, an out-of-round end, or a wall thickness at the edge of the fitting's range all create a leak path. The tube must also be softer than the ferrule so the ferrule can bite; over-hard tube prevents the swage. Match tube grade and hardness using the tube sizing and wall thickness guide.
Gas Leaks, Re-Make-Up & Why Re-Tightening Rarely Works
Gas finds smaller gaps than liquid, so an instrumentation gas leak can persist at a make-up that holds water; verify with the leak-test methods below. If a seated joint leaks, re-tightening it usually will not fix it, the ferrule geometry is already set. Re-pull only to the gauge; if it still leaks, replace the ferrule and nut rather than forcing the connection.
NPT & Tapered-Thread Leaks vs the Mechanical Seal
A leak at the pipe thread is a different fault from a leak at the tube nut. Tapered NPT threads seal by thread engagement plus a sealant such as PTFE tape or paste, per ASME B1.20.1, not by the ferrule. How much PTFE tape an NPT thread needs is a frequent question: the general rule is two to three wraps applied in the direction of the thread, enough to fill the thread form without over-packing, too many wraps can crack a female fitting, while thread paste is the alternative on larger or reused threads. Re-do the thread seal and confirm engagement; first, identify your thread type so you treat the correct seal.
No Grip: Tube Blow-Out, Cracked Ferrule & Ferrule Not Biting
If the tube pulls out or blows out under pressure, the ferrule is not gripping. Causes are a tube that was never bottomed, a tube harder than the ferrule, a ferrule fitted backwards, or an over-swaged ferrule that cracked or split. A blown-out tube on a pressurized line is a safety event, depressurize before touching it. The fix is to replace the ferrule set and re-make on a fresh, bottomed tube end with the correct hardened or non-hardened ferrule. Source correct replacements from nut-and-ferrule sets, ferrules, or spare ferrules and nuts. If you are unsure whether a single or double ferrule suits the service, compare the single vs double ferrule designs.
Galling & Seized Nuts on Stainless Fittings
Galling is the number-one make-up frustration on stainless. 300-series stainless steel cold-welds against itself under the pressure and motion of tightening, tearing the threads and seizing the nut. Prevent it with a thread lubricant or anti-seize, or specify silver anti-galling plating on the hardware, a standard Crestflo finish option. Once threads have galled, replace the parts; never force a seized nut, which only tears the threads further and can crack the body.
Vibration & Fatigue Leaks on Instrumentation Lines
A joint that seals on install but weeps after run-time is usually a vibration or fatigue failure: cyclic loading loosens an under-supported run or fatigues the tube at the ferrule. Support and clamp tubing at proper intervals with tube clamps, then re-make the affected joint. Crestflo fittings are qualified under a test regime that includes flexure fatigue, rotary flex, and vibration, so the design assurance is proven at the maker's bench rather than assumed.
Leaks From Mixing or Interchanging Fitting Brands
Ferrule and nut geometry differs between manufacturers. Combining a nut from one brand with a ferrule or body from another puts the swage in the wrong place and leaks, even when the parts look identical. Rebuild the joint on one consistent, ASTM F1387-qualified system rather than mixing hardware. Crestflo fittings are engineered for dimensional interchange with major brands, backed by ASTM F1387 performance qualification; to move a line across without a part-by-part guess, request your cross-reference from the engineering team. Read more on why mixing tube fitting brands leaks. Swagelok® and Parker® are trademarks of their respective owners; Crestflo is not affiliated with them.
Corrosion & Material-Caused Leaks (Chloride, Sour Service, Pitting)
Not every leak is mechanical. A pinhole, a crack, or localized pitting means the alloy is wrong for the service, not that the fitting was fitted badly. Chloride stress-corrosion cracking, H₂S / sour-service cracking, and pitting attack destroy the seal from the inside. The fix is to re-select the correct corrosion-resistant alloy, 316/316L, 904L, Duplex 2205, Super Duplex 2507, 254 SMO, Alloy 20, or a nickel alloy such as Inconel 625 or Hastelloy C-276, and follow NACE MR0175 / ISO 15156 for sour service. See material selection by service, sour-service selection for NACE, and offshore chloride selection.
Quick-Connect & Push-to-Connect Fitting Leaks
Quick-connect and push-to-connect fittings seal on an O-ring and hold with a collet, so their leaks are different again: a worn or nicked O-ring, insufficient insertion, or a damaged collet. Reseat the tube fully, or replace the O-ring or the unit. Browse quick-connects and push-to-connect fittings for replacements.
Instrumentation Valve Leaks: Stem, Packing, Gland, Bonnet & Seat
Needle Valve Stem, Packing, Gland & Bonnet Leaks
A valve leaking at the stem, a needle valve leaking or a valve packing leak, usually means a loose gland or worn packing. Re-torque the packing gland first; if it still weeps, replace the packing and confirm the packing material suits the operating temperature. A leak at the bonnet-to-body joint is a distinct location: a valve bonnet leak points to a loose bonnet nut or a worn bonnet seal or gasket rather than the packing, so re-seat and re-torque the bonnet and renew its seal before disturbing the packing. PTFE, graphite, and PEEK packings each have standard temperature limits, match the seal to the service using the seal material temperature selection guide, and replace worn units from the needle valve range.
Seat Leaks, Passing Valves, Manifolds & Relief Valves
A valve that passes flow when shut has a seat leak: a damaged or contaminated seat, debris across the seat, or a seat material wrong for the media or temperature. Clean or replace the seat. On a relief valve the same seat leak reads as simmer or weeping, a faint seep or hiss as line pressure nears the set point, and usually traces to seat damage, debris, or a system pressure sitting too close to the set point; clean or renew the seat and confirm an adequate margin below the set pressure. Crestflo instrumentation valves and manifolds qualify to ASME B16.34 and the applicable API test standards (such as API 598), and manifolds receive a 100% seat and shell leak test before shipment. For manifold and relief-valve issues, see the 3-valve manifold and relief valve ranges.
How to Leak-Test & Verify the Fix
Verify every re-make before returning the line to service. A bubble or "snoop" leak-detection fluid is the standard first check for accessible joints; a pressure-hold test confirms the whole assembly; and a helium leak test is used for critical, vacuum, or high-purity service where the smallest gas leak matters. Re-test after every re-make, a joint that looked sealed can still weep gas. Crestflo backs its fittings and manifolds with a full test regime including hydraulic proof, pneumatic, and 100% seat and shell leak testing on manifolds.
When to Re-Make, When to Replace & How to Prevent Recurrence
A correctly swaged ferrule can be re-made a limited number of times, but re-tightening a seated joint that leaks rarely helps. Replace the ferrule and nut when the ferrule is cracked, over-swaged, galled, or corroded, or when the tube end is damaged. Prevent recurrence by gauging every make-up, bottoming and squaring the tube, supporting the run against vibration, keeping one brand of hardware per joint, and selecting the right alloy for the media. Standards, ratings, and dimensions on this page follow the applicable published standards and are customizable to requirement.
Standards, Testing & Proof Behind the Diagnosis
Crestflo diagnoses these failures as the manufacturer, not as a forum. Fittings are tested per ASTM F1387, the compression-tube-fitting performance qualification that anchors dimensional interchange; valves qualify to ASME B16.34 and the applicable API valve-test standards; NPT threads follow ASME B1.20.1; and sour-service material selection follows NACE MR0175 / ISO 15156. Every part carries a heat or lot number for full traceability, with EN 10204 3.1 material test certificates standard and 3.2 on request, so a suspect batch can be traced. Crestflo is ISO 9001, ISO 14001 and ISO 45001 & PED certified, runs in-house NDT and PMI for material verification, and outsources destructive testing to ISO/IEC 17025-accredited laboratories. This page is reviewed by the Crestflo Engineering Team.
Get the Right Replacement Parts Fast
Crestflo is a US-serving instrumentation manufacturer and the instrumentation division of a four-decade-old, Government-of-India-recognized export house with a long Middle-East delivery record. Replacement ferrules, nuts, fittings, and valves are supplied in stainless and high-nickel alloys with heat-number traceability: ready stock for standard items · made-to-order for specials · 6–8 week delivery. Origin is Indian, with US or European melt available on request and full material traceability. To fix a leak fast, request a quote for replacement ferrules, nuts and fittings, or contact the engineering team to review a fitting failure. Reach US sales at sales@crestflousa.com or +1 346 594 9005 (Houston, TX).
Why Crestflo for Instrumentation Fitting Reliability
Crestflo fittings are engineered for drop-in dimensional interchange with the major brands, backed by ASTM F1387 qualification, fewer mixed-brand leaks by design. Hardened and non-hardened ferrules are supplied to requirement, silver anti-galling plating counters stainless galling, and heat-number traceability with material test certificates lets you trace any suspect batch. Small minimum order quantities, private-label options, and a 6–8 week lead time on replacement fittings and ferrules round out the offer. We Engineer Confidence.
Frequently Asked Questions
Why is my tube fitting leaking even after I tightened it?
Most often the joint is under-pulled-up or has been over-tightened. Verify make-up with a gap-inspection gauge rather than by feel. If the ferrule is cracked or over-swaged, cut it off and re-make on a fresh, bottomed tube end.
My compression fitting is leaking, is the fix the same as a plumbing fitting?
No. This guide covers instrumentation stainless and alloy fittings, which seal by a swaged ferrule, not by a copper or brass plumbing ferrule. Do not apply plumbing "just tighten it more" advice; gauge the make-up instead.
How tight should an instrumentation tube fitting be?
Pull the nut past finger-tight to the fitting maker's specified amount, commonly about 1-1/4 turns for 3/8 in and larger sizes and less for smaller sizes per general practice, and confirm the result with a gap-inspection gauge. Request the make-up turns for your exact size and alloy from the engineering team.
Can I reuse a ferrule or re-tighten a fitting that leaks?
A properly swaged ferrule can usually be re-made a limited number of times, but re-tightening a seated joint rarely stops a leak. If it still leaks, replace the ferrule and nut and re-make on a clean tube end.
Will a weeping fitting seal itself if I leave it?
No. A weeping instrumentation joint will not self-seal. Re-make it correctly or replace the ferrule set, then leak-test before returning the line to service.
Why do my stainless fittings gall and seize?
300-series stainless cold-welds under make-up. Use an anti-seize or lubricant, or specify silver anti-galling plating on the hardware. Once parts have galled, replace them; never force a seized nut.
How do I fix a leaking quick-connect fitting?
Check the O-ring seal and confirm the tube is fully inserted. Reseat the tube, or replace the worn O-ring or the unit. Quick-connect and push-to-connect fittings seal differently from compression fittings.
My leak is at the pipe thread, not the tube nut, what now?
That is a tapered NPT thread seal, sealed by thread engagement plus PTFE tape or paste per ASME B1.20.1, not by the ferrule. Re-do the thread seal and confirm engagement; identify your thread type first.
The tube keeps blowing out under pressure, why?
The ferrule is not gripping. The tube may be un-bottomed, too hard, or fitted with the wrong ferrule. Replace the ferrule set and bottom the tube before pull-up. Never work on a pressurized line.
My leak is corrosion, not make-up, what changed?
Chloride cracking, pitting, or H₂S cracking means the alloy is wrong for the service, not that the fitting was fitted badly. Re-select a corrosion-resistant alloy and follow NACE MR0175 / ISO 15156 for sour service.
My valve leaks at the stem, how do I stop it?
Re-torque the packing gland first. If it still weeps, replace the packing and confirm the packing material suits the operating temperature.
Where do I get correct replacement ferrules and nuts fast?
Crestflo supplies ASTM F1387-qualified replacement ferrules, nuts, and fittings in stainless and high-nickel alloys with heat-number traceability, ready stock for standard items, made-to-order for specials, 6–8 week delivery. Request a quote to order.
Related Instrumentation Guides & Products
- Ferrule installation and gauging
- Why mixing tube fitting brands leaks
- Thread identification guide
- Tube sizing and wall thickness
- Hardened vs non-hardened ferrules
- Seal material temperature selection
- Material selection by service
- Replacement ferrules and nuts
- Tube fittings · Instrumentation valves · Instrumentation fittings resource hub